Three-step guide to learning swimming: Master the basics in one week, achieve buoyancy in two weeks, and perfect the breaststroke in three weeks.
Initially, I started writing a swimming-focused public account purely out of personal interest—following the idea that eating alone isn’t as enjoyable, watching a movie solo doesn’t bring much joy, and exploring a place alone rarely feels fully satisfying. That’s why I decided to share my personal experiences and insights about swimming. Before I knew it, I’ve been writing since November 2018. Looking back at the more than 400 articles I’ve published, I notice that most focus on improving swimming techniques, while there are relatively fewer resources dedicated to helping beginners get started.
This weekend, in fact, I ended up teaching two people how to swim—one with zero experience and the other a maritime police officer. Watching them reminded me vividly of my own early days learning to swim. So, I decided to write an article about self-learning to swim, hoping it will be especially helpful for those who are eager to pick up the sport but have no prior experience at all.
1. For complete beginners, start learning breathing techniques before diving into swimming.
The first week of learning to swim is crucial—ideally, practicing in the water every day helps your body naturally "switch on" to the swimming mindset. For complete beginners, there are typically three main concerns: first, fear of water that prevents them from fully relaxing; second, anxiety about choking or struggling to breathe and exhale properly; and third, worry about losing balance and being unable to stand up safely in the water. That’s why, when teaching someone with no prior experience, it’s essential to first focus on mastering proper breathing techniques and helping them learn how to relax their bodies completely.
Through rhythmic breathing exercises, develop the habit of naturally exhaling continuously underwater and inhaling effortlessly as you surface—letting this routine become your body’s instinctive cue to enter the water-ready mode. Rhythmic breathing means gently blowing bubbles as soon as your mouth or nose enters the water, softly releasing air underwater while maintaining a steady exhalation rate. Imagine holding a tiny straw in your mouth, delicately blowing to create soap bubbles. As soon as your mouth breaks the surface, slightly open it to allow air to flow in naturally—avoid forcing an inhalation. The key to preventing water from entering is to hold a small reserve of breath before surfacing, then, at the exact moment your nose clears the water, increase the force of your exhalation to fully expel all stale air. This controlled, complete exhalation is what enables your mouth to open naturally for an effortless intake of fresh air.
2. Beginner's Guide to Learning Floating from Scratch
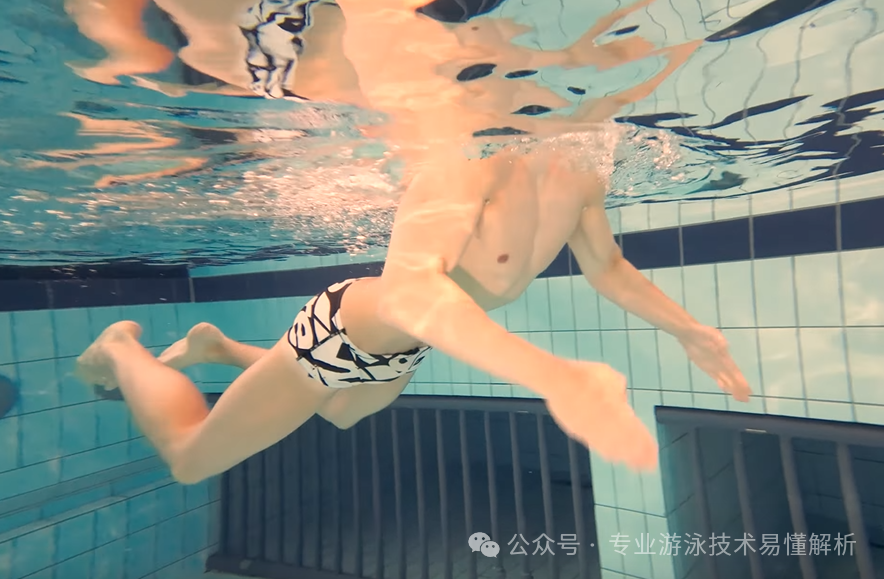
When first learning to float, don’t rush into practicing flat-body floating while holding your breath on the water’s surface. Instead, start with the dolphin glide, since many beginners lose their balance and struggle to stay upright in the pool when they feel anxious. Mastering the dolphin glide will help you build confidence and stability, after which you can gradually progress to other techniques—such as flat-body floating, the "big-character" float, the Superman float, and finally, the back float.
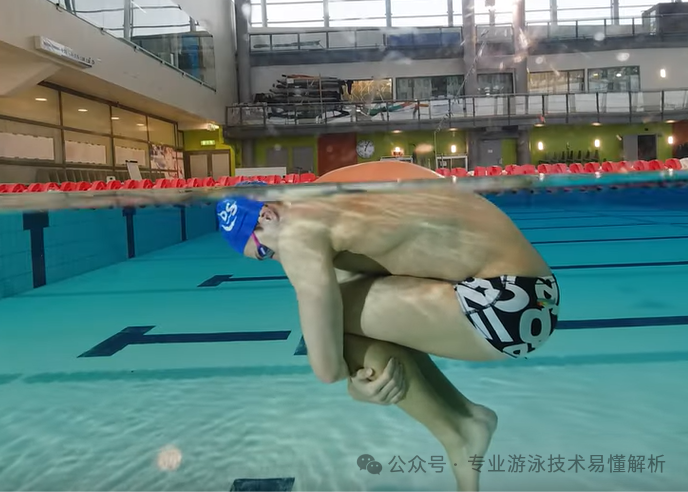
Through dolphin float practice, develop the habit of standing in the water by first ensuring your feet touch the pool bottom, with your head emerging last—this helps build a calm and composed mindset. The specific steps involve entering the water, curling up your body, hugging your knees with your arms, allowing your body to naturally float, then gently releasing your grip. Once your legs are firmly planted on the pool bottom, slowly lift your head out of the water last. After mastering this, continue practicing how changes in head position—moving it up, down, or side to side—affect your body’s floating posture in the water, further enhancing your overall water awareness and control.
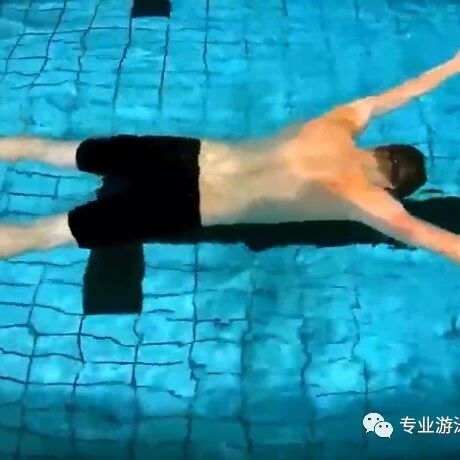
Through the Superman glide exercise, feel the buoyancy of water supporting your body—every part of you: your hands, feet, head, and even the subtlest movements and tiny bursts of energy in your core and abdomen—all play a crucial role in maintaining balance underwater. To practice the horizontal glide, extend both arms forward, shoulder-width apart, making sure not to tense them; let them relax naturally as you reach out. When first attempting the horizontal glide, gently push off the pool bottom with your legs to help lift them toward the surface. Once you’ve mastered this technique, transition into the "big-character" glide: spread your arms wide and keep your legs extended in a large "T" shape. During the big-character glide, your legs might initially sink—so lightly wiggle your feet, using the tops of your feet to gently kick the water and bring your legs back up to the surface. With practice, progress to the Superman glide: extend your arms forward again, but this time keep your legs slightly together, and experiment by flicking your feet to see if you can start gliding smoothly through the water.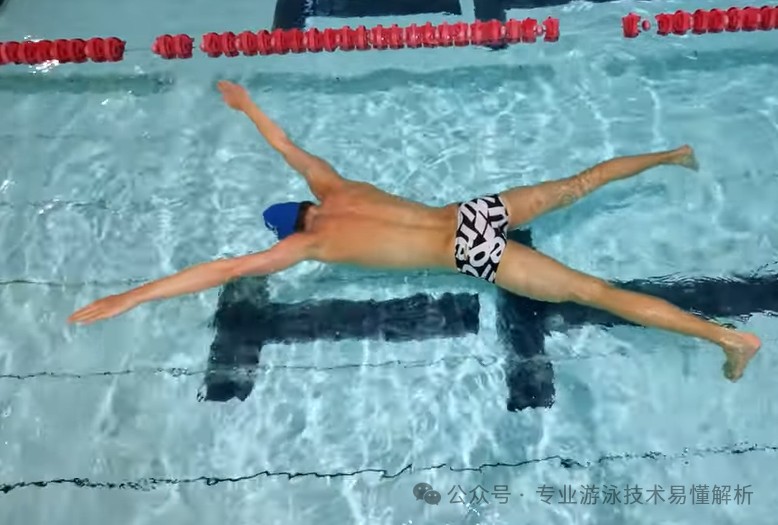
3. Start from Zero—Master Balance in the End
Some might wonder: Isn’t floating just about balance? In fact, floating is a static state, whereas when swimming, your body posture constantly shifts back and forth, disrupting that floating position. Balance exercises, therefore, are designed to ensure your body can effortlessly return to a floating state whenever needed. Mastering balance lays the groundwork for the next step—learning how to perform specific swimming strokes while maintaining dynamic buoyancy.
From a physical posture perspective, balance has two key dimensions: first, the equilibrium between the upper and lower body—keeping the lower and upper halves aligned at the same horizontal plane—and second, the balance between the left and right sides of the body. In either case, maintaining stability hinges on activating your core strength: gently engage your abdominal muscles to create a solid pivot point. Think of your upper and lower body as the two ends of a seesaw. If the lower half starts to sink, the upper-body arms can lightly lift out of the water—crucially, without applying any additional force or tension. By keeping your arms relaxed yet poised, you allow their own weight to work effectively. Meanwhile, as the arms break the surface, the reduced buoyancy of the upper body causes the lower half to rise slightly. This is precisely how the "seesaw" exercise functions!
After repeated practice, you can gradually progress from lifting your arms out of the water to raising just your forearms—and eventually, only your palms need to break the surface. Meanwhile, your legs will naturally begin to float upward. This progression signifies improvement in two key areas: first, you’re beginning to master body relaxation, and second, you’re learning how to engage your core muscles effectively to keep your abdomen firmly tucked in.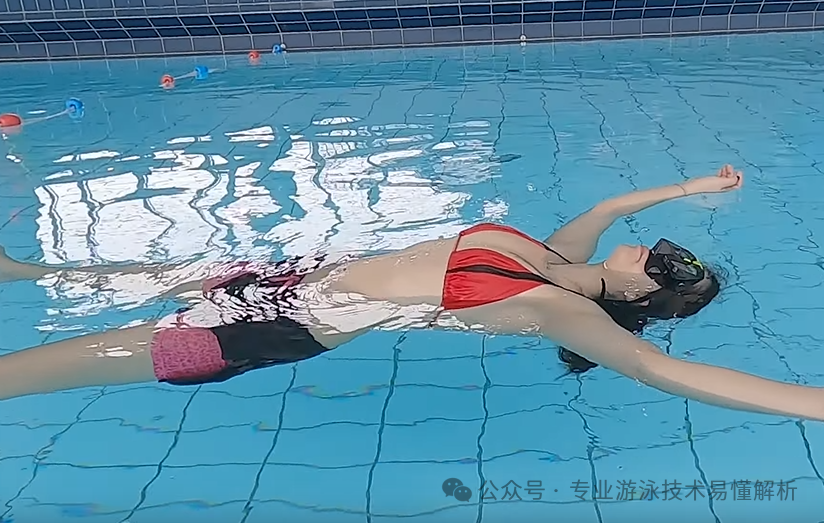
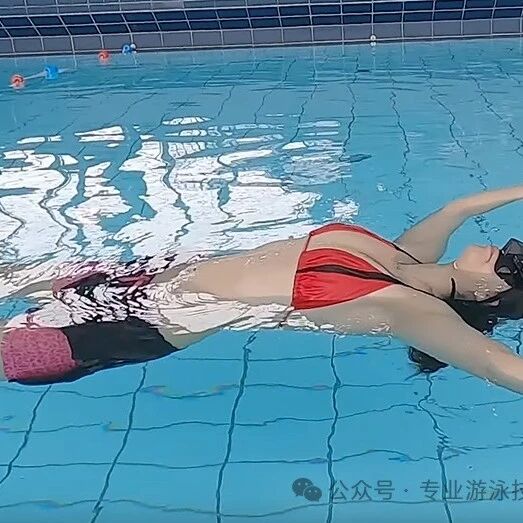
Next, you can practice back floating. Beginners often find it easy to relax their bodies when floating faceup, but back floating can trigger a fear of sinking. There are two effective approaches: First, practice dolphin floating by tilting your head back gradually and then slowly opening up your body until you achieve the back-floating position. Alternatively, ask a swimming buddy to gently support the back of your head and lightly pull upward toward your head—this method is commonly used by coaches to help young children master back floating.
Of course, you don’t have to practice the back float—yet. For outdoor swimming, mastering the back float and head-up frog kick is essential, but if you’re only swimming in a pool, you can always come back to practicing the back float later. You can skip the back float altogether and still learn breaststroke or freestyle. Once your water confidence improves, you can transition directly from the flat float into a side roll—and even move straight into the back-float position if that feels more natural.
Before learning breaststroke and freestyle, it’s important to understand the proper learning sequence: First, master the breaststroke arm movements combined with breathing; then, practice the coordinated "frog kick"—a single, fluid motion that integrates kicking and pulling. Finally, focus on perfecting the overall stroke by practicing the principle of moving your arms while keeping your legs still, and moving your legs while your arms remain stationary.
For freestyle, you don’t need to start with the flutter kick right away. Instead, begin by practicing the side-to-side arm strokes, followed by the "gun-arm" glide, then progress to mastering the body roll, and finally work on coordinating the entire freestyle movement.
For breaststroke, beginners often tend to lift their heads too high or overexert their outward arm movements, causing their heads to rise excessively out of the water—and once they do fall back in, they sink even deeper. This is a common challenge that many beginners struggle to overcome when learning breaststroke. As for freestyle, beginners frequently get stuck on breathing techniques. However, if they first master the proper freestyle arm strokes, breathing becomes no longer an issue. By practicing the freestyle stroke technique—ideally with the help of a snorkel to focus on form—they’ll naturally find themselves breathing smoothly and effortlessly.
One WeChat official account shares swimming tips, while another focuses on software insights, online resources, and reading experiences.
Thank you for your supportive and encouraging likes, as well as the comments that spark meaningful conversations—and even more, we’d love to see those shares and retweets!