FYB Tutorial Deep Dive (Forehand Basics 1)


With the release of this work, the basic structure of the "Grassroots Tennis" subscription account has now been fully established.
The "Deep Roots, Lush Leaves" column focuses primarily on tennis techniques themselves, featuring in-depth tutorial analyses and practical tips for improvement.
The "Get to the Root" segment primarily explores the principles behind tennis, covering areas like human physiology and physics.
The "Rooting Down" column primarily shares insights from tennis learning, including match analysis and practical study methodologies.
A towering skyscraper begins with a solid foundation—just as a single blueprint is essential when it comes to playing tennis. In this context, your mindset serves as the blueprint, while your actions are the actual "construction" on the court. After all, it’s your awareness that guides every move you make. Once this systematic blueprint is in place, targeted improvements to specific technical details can be implemented—kind of like prefabricated components being added where needed, allowing for flexibility without compromising the overall structure of your game. Of course, any adjustments aimed at enhancing performance at the expense of stability should be carefully considered. Finally, diving into instructional materials is the process of building that crucial blueprint. And by reading these resources thoroughly, you’ll gain a deeper understanding of the finer technical nuances—preparing yourself not only to refine your current skills but also to tackle more advanced techniques down the road.

Prefabricated Modular Homes
"FYB" stands for Fuzzy Yellow Ball, literally "fluffy little yellow ball." The tutorial’s title is both lively and engaging, while its content is clear, concise, and easy to follow. Overall, based on the tutorials I’ve studied so far, this one truly stands out as an excellent resource. In this article, I’ll closely analyze the six foundational components of the forehand stroke—using the white sections to highlight the core tutorial content, the green sections to emphasize key details, and the yellow sections to explore my own extended reflections on the topic.
Twisting the torso and rotating the shoulders
To avoid any ambiguity, the tutorial explains the footwork section, clarifying that "outside foot" and "inside foot" are defined based on the direction of body rotation. For ease of understanding, this article specifically defines these terms for right-handed players: the outside foot refers to the right foot, while the inside foot is the left foot.
The forehand begins with the ready stance—lift the tip of your left foot and pivot toward your right foot.
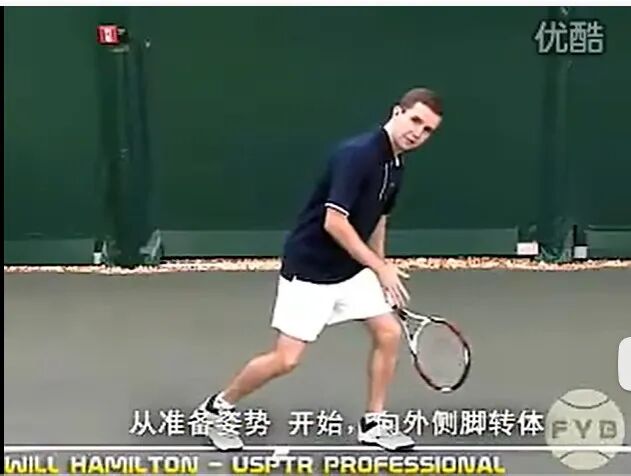
Turn your body toward the right foot.
Technical detail: Weight is shifted onto the right foot.
Extended thought: If you can’t sense where your center of gravity is, your left leg’s ligaments will help you make the decision. If, at this moment, you gently lower your left heel and feel a stretch in the ligament, it means your center of gravity is somewhere between your left and right feet—and the more pronounced the stretch, the closer your center of gravity is to your right foot. On the other hand, if there’s no sensation of stretching, you’re simply balancing on the balls of your left foot, indicating that your center of gravity remains firmly between both feet, with insufficient weight transfer. Finally, if you notice a stretch along the arch of your left foot, it confirms that your center of gravity has shifted entirely onto your left foot.
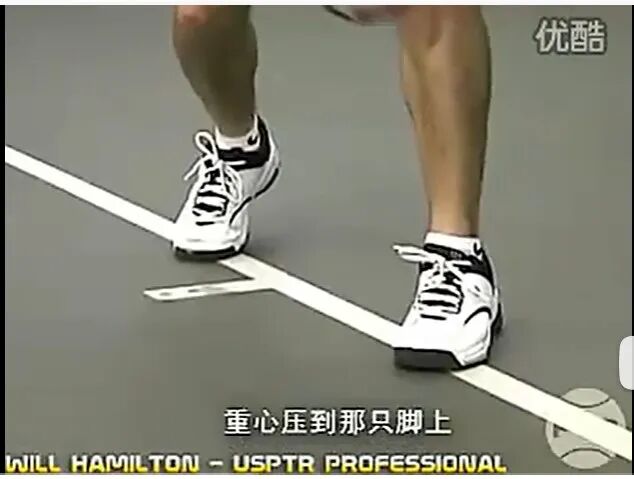
Weight is centered on the right foot.
Lift your left heel again, then rotate your shoulders. As you twist your body, let your hips open naturally while your shoulders follow, turning smoothly and effortlessly—this movement helps you initiate the backswing for your forehand stroke. At the very start of the backswing, your arms remain completely still; instead, it’s the rotation of your torso and shoulders that subtly guides the racket backward. Even without any deliberate arm motion, the racket begins to move back simply because your shoulders are turning sideways, pulling the racket along with them. It’s the shoulder rotation that sets the ball in motion for the backswing—your arms stay perfectly still until the actual swing begins.
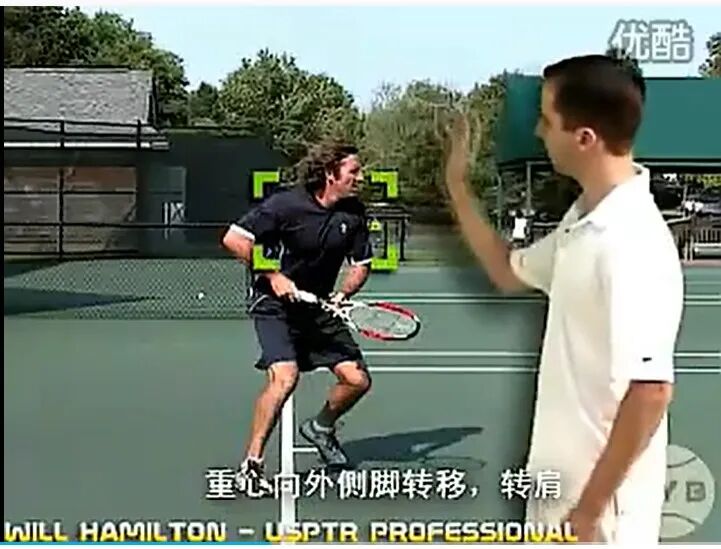
Start the backswing with your arm still.
Extended thought: There are two subtle details worth paying attention to. First, why is lifting the heel of the left foot emphasized? The previous step was designed to shift your weight onto your right foot, while this rotational movement aims to align your footwork with the turn itself. If you don’t lightly lift your heel, your foot essentially slides across the ground as a flat surface, creating unnecessary friction and resistance. By gently raising your heel, however, only a single point of contact remains between your foot and the floor, making it far easier to initiate smooth, fluid rotations—after all, the goal is to ensure your movements flow effortlessly without any stalling or catching. Second, notice how your arm remains rigid and tense during the initial backswing phase, gripping the racket tightly. This tension in your arm is actually the root cause of overexertion throughout the entire stroke. Whenever you consciously think about guiding the racket to a specific position during the backswing, your arm inevitably engages—and once it does, there’s little room left for relaxation afterward. To break free from this pattern, let go of the idea of "fully setting up" the racket at the start. Instead, simply allow your shoulders to rotate naturally in sync with the motion, letting the momentum carry you smoothly into the next phase.
Swing the racket backward
Pull the racket back, with your non-racket hand extended horizontally in front of your body—rather than pointing toward the incoming ball as traditionally done. Begin by rotating your torso and shoulders, keeping your non-racket arm fully extended and positioned horizontally across your chest at shoulder height, roughly parallel to the baseline. This non-racket arm plays a crucial role in helping you maintain balance and accurately judge the trajectory of the incoming shot. As you extend your non-racket arm outward, simultaneously pull the racket back with your dominant arm—both movements happening in perfect coordination, putting your sense of timing and control to the test.
At this point, the body's posture is referred to as the "loaded-up position" or "coil position." The key here is that once this movement is executed, the backswing is already complete—and you're fully ready to swing forward and strike the ball, with no remaining backward momentum.
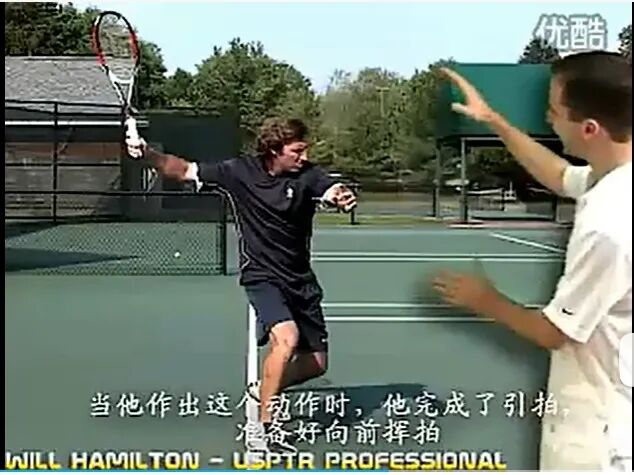
Loaded position
Extended thought: While the importance of the "trophy pose" during the serve is widely recognized, the "power-gathering stance" for both forehand and backhand shots also holds significant research value. However, depending on each player's unique style, I believe the key elements of the power-gathering stance should be carefully emphasized, while other aspects can vary from one player to another.
First, hold the racket with your non-dominant hand at shoulder height.The non-racket hand primarily serves three key functions: judging the distance of the incoming ball, maintaining body balance, and stretching the chest muscles to increase racket speed. Judging the ball's distance is straightforward—accurately perceiving an object's movement requires a reference frame. When the non-racket hand consistently positions itself in the same spot during each backswing, it establishes a stable reference point for assessing the incoming ball, which is essential for making an effective hit. As for maintaining body balance, this can be trickier to grasp. Balance actually involves two types: static and dynamic. Static balance is easy to understand—during the preparatory stance, you distribute your weight evenly, keeping your center of gravity slightly shifted toward your right side.
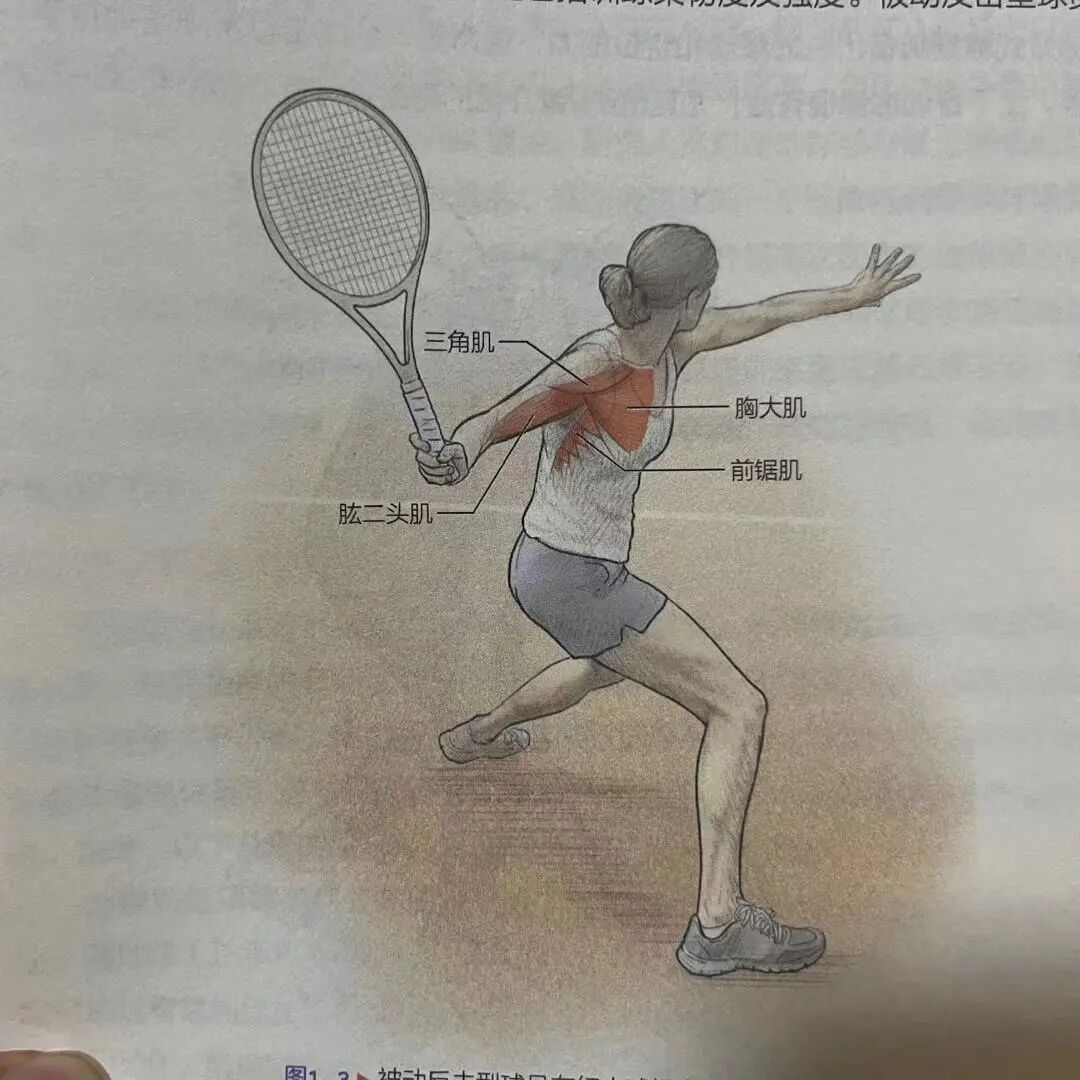
Powerful stance, side muscles holding the racket
Dynamic balance means that, when swinging forward, the muscle groups on both sides of the body should be used in a largely symmetrical manner. On the racquet-holding side, the primary muscles engaged—such as the deltoids in the shoulder and the back muscles—are responsible for pulling the racket backward into the power-ready position. Rotational movement, however, can only generate stable spin if the rotation axis remains balanced on both sides. (Think of this like balancing a bamboo dragonfly.) Therefore, to ensure stable rotation, the non-racquet-holding side must activate the same muscle groups in a complementary, balanced way. Ideally, the optimal positioning for the shoulder deltoids and back muscles on this side is at shoulder height. If the non-racquet hand hangs loosely downward, it becomes far too easy for the arms to cross after impact, with the non-racquet hand inadvertently blocking the body’s rotational motion. Conversely, if you simply drop your non-racquet arm altogether, your entire upper body ends up resembling an eccentric wheel—making it virtually impossible to maintain any sense of balance at all.
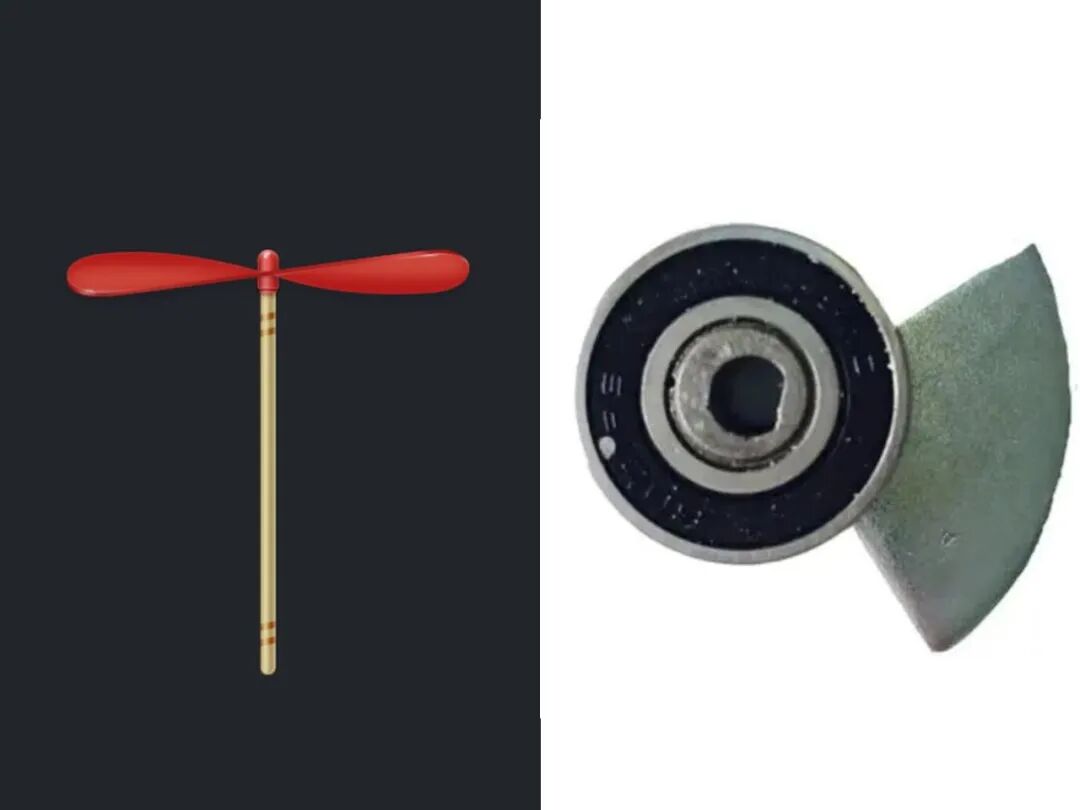
A bamboo dragonfly? Or a cam mechanism?
Second, after adopting a ready stance, strike only forward.If, after initiating the power-gathering stance, you still experience a backward swing, you’ll likely miss the perfect timing for your shot. This will result in an unstable combined force between the ball and the racket, creating that uncomfortable "squeezed" sensation. My advice? To overcome the habit of moving backward after adopting the power-gathering stance, simply start with the stance and immediately execute an empty swing—no need to follow through!
Swing the racket toward the hitting point.
The swing motion from the completion of the backswing to the hitting point consists of three parts.
Part 1: The outer foot (right foot) pushes off the ground with force, lifting the heel. Raising the heel is essential for executing Part 2.
Part 2: Rotate your upper body until you're facing the net—keeping your heels off the ground will make the rotation much more challenging (lifting your right heel during the swing is what creates that powerful ground-feel).
Part 3: Swing the racket forward until you reach the hitting point. As you swing, let the racquet head drop slightly before making the forward motion—essentially, it’s as if you’re tracing a letter "C" with the racquet head during the swing.
Combine the three parts so that, at your hitting point, the racket is slightly positioned ahead of your body.
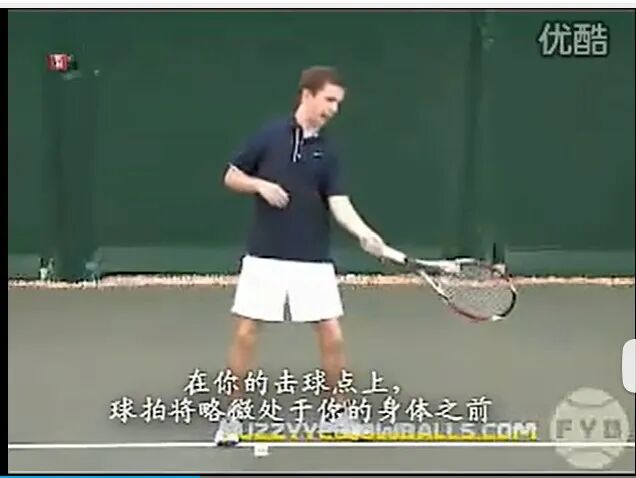
The position of the hitting point
Extended thought: Lifting the heel echoes the rotational power buildup from the previous body turn. If you want to rotate your torso toward the opposite side, simply lift the heel of that same foot—following the same principle. Overall, the hitting point is positioned slightly in front of your body, which is what we commonly refer to as "hitting in front of you." However, the exact height of the hit and its distance from your body can vary depending on your grip: the more continental the grip, the lower and closer to your body the ball will be struck; conversely, with a more Western-style grip, the ball will land higher and farther away from your torso.
If you hit the ball with the aforementioned swing, the racket face will strike the ball vertically—toward its backside and near the center.
The swing path refers to the trajectory of the racket as it moves during the stroke—starting from the ready position, passing through the impact point, and continuing into the follow-through. The key takeaway is this: once the non-racket hand releases the handle, the racket’s motion must keep going without stopping.
Break down the forehand motion into several steps, but make sure not to mistakenly think that the racket can come to a stop during the swing.
From the moment your non-racket hand releases the racket until the follow-through is complete, your racket must never come to a stop.
Extended thought: Modern forehand technique requires a relaxed arm—once a player pauses during the forward swing of the racket, the kinetic chain is disrupted. To still hit the ball effectively, they must rely on other muscles for compensation, often leading to missed timing and unnecessary tension in the arm. The ideal approach? Anticipate the ball’s trajectory, adjust your footwork to position yourself perfectly at the hitting point, and then deliver the shot in one fluid motion—“bam!”
Swing the racket toward the hitting point.
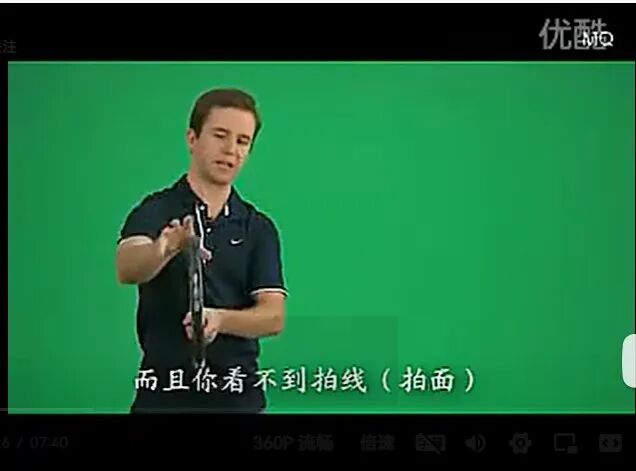
The final step of a powerful forehand is the follow-through: starting from the point of impact, extend your arm in the direction of the shot, swinging it past the front of your body in a smooth, relaxed motion.
The key point is this: as you extend your arm and swing it forward, imagine you’re wearing a watch on your wrist—and when you turn your arm, you instinctively want to glance at the time.
The key to the follow-through lies in extending your arm toward the direction of the swing.
Then swing the racket upward, letting your arm wrap around your shoulder as you follow through.
From the point of impact to the completion of the follow-through, as shown in the following series of images:
Hit the ball, tap the ball
Arm extends toward the direction of the swing.
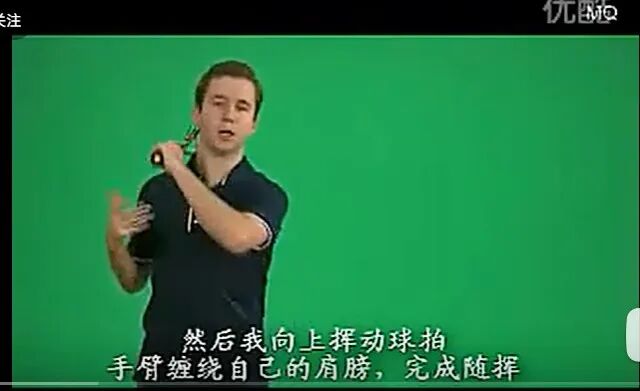
Arms wrap around the shoulders, folding neatly onto the shoulder.
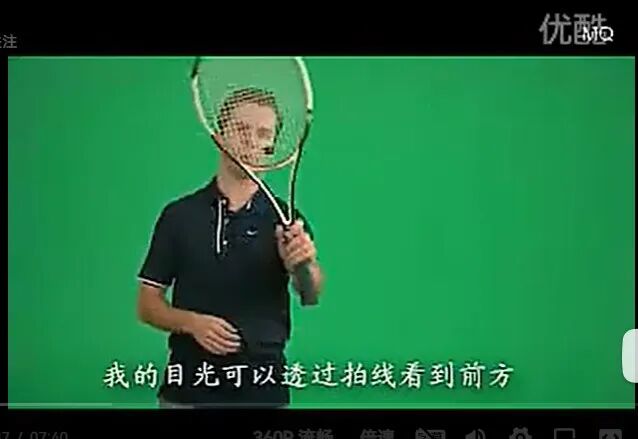
Extended thought: As you follow through, extending your arm toward the direction of the shot helps maintain the racket’s intended motion. Although the contact between ball and racket is brief, keeping the racket moving in a consistent direction naturally influences the ball’s trajectory, causing it to curve as desired. Conversely, if you fail to extend your arm in the hitting direction, the racket’s movement becomes unpredictable, leaving the outcome entirely up to chance once the ball makes contact. The inward rotation of the forearm (think of turning your wrist like flipping a watch) is crucial for generating the relative motion between the racket and the ball—specifically, creating topspin. When the ball makes contact with the racket, it moves downward relative to the racket, while the racket itself moves upward. This precise interaction is what produces the topspin effect. Importantly, topspin isn’t achieved by brushing the bottom of the ball from below; rather, it results from the relative motion created between the racket and the ball during impact. Without this inward forearm rotation, even if you’re hitting at waist level (around 1.2 meters above the ground) along the baseline, the ball will likely fall short of the net. Based on calculations, when the ball travels about 12 meters across the court, it’ll easily clear the net’s minimum height of 0.9 meters. Pay close attention to the racket’s position as your arm extends forward during the swing. If, as shown in Figure 2, the racket remains perfectly vertical—so that the face isn’t visible—you’ll need to raise it higher than shoulder height to ensure the ball gets enough topspin. However, if you opt for a "windshield-wiper" forehand technique (where the racket faces you and you can see the strings), you won’t need to raise the racket as high—or you might even bring it lower. Ultimately, your focus should be on monitoring the racket’s orientation, as your chosen playing style will determine exactly where and how far you extend your arm during the follow-through.
Rainbow-style forehand follow-through
Course Summary: This session primarily focused on traditional techniques, particularly emphasizing weight transfer, lifting the heel to facilitate smoother rotations, maintaining a consistent swing path, and adopting a more practical approach during the follow-through. A limitation of the course was that it didn’t yet clearly explain the widely recognized “windshield wiper” forehand technique. My personal perspective is to first master the traditional forehand stroke—focusing on generating powerful, penetrating shots—and then move on to learning the windshield wiper style. Unfortunately, I myself took too many detours by attempting the windshield wiper technique right from the start, which resulted in consistently hitting the ball far too shallow. As a result, while my shots had spin, they lacked speed, leading to more losses than wins.
The next lesson will provide a detailed analysis of the similarities and differences between the windshield-wiper forehand and the traditional forehand, aiming to achieve the comparative "blueprint" you have in mind.