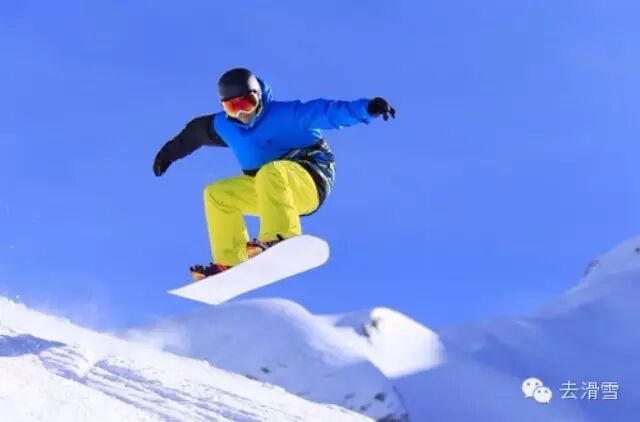
Snowboarding terminology you definitely didn’t know

25 min read
Snowboarding terminology you definitely didn’t know

62 Snowboarding Terms Explained: Skiing Movements

Front hand
The hand closest to the edge of the board. For skiers with their left foot forward, it’s the left hand; for those with their right foot forward, it’s the right hand.

Backhand
The hand closest to the tail of the board. For skiers with their left foot forward, it’s the right hand; for those with their right foot forward, it’s the left hand.
Front foot
The foot closest to the edge of the board. For skiers with their left foot forward, it’s the left foot; for those with their right foot forward, it’s the right foot.

Back foot
The foot closest to the tail of the board. For skiers with their left foot forward, it’s the right foot; for those with their right foot forward, it’s the left foot.

Toe edge – Front edge
When you've locked in your stance—whether gliding with your left foot forward or your right foot forward—the edge of the snowboard facing the direction you're heading is known as the front edge.


Heel edge – Back blade
When you've properly set your stance—whether sliding with your left foot forward or your right foot forward—the edge of the snowboard facing away from you is the back edge.

Fakie
The situation where one skis in the opposite direction of their stance. For example: A skier with their left foot forward switches to skiing forward using their right foot instead.

Ollie

Derived from the motion of snowboarding. After lifting the front foot, the back foot uses the board's elasticity to achieve an airborne movement—no actual jump required.

Nosebone
Kick out with the front leg, while bending the knee of the back leg to form a bow stance.

Tailbone
Kick out with the back leg, while bending the front knee to form a bow stance.

Frontside turn
For skiers with their left foot forward, it’s a left turn—but for left-handed individuals, it’s a right turn.

Backside turn
For skiers with their left foot forward, it’s a right turn; for left-handed skiers, though, it’s a left turn.

Frontside rotation
For skiers with their left foot forward, it’s a counterclockwise turn, while for left-handed individuals, it’s a clockwise rotation.

Backside rotation
For skiers with their left foot forward, the rotation is clockwise, while for left-handed individuals, it’s counterclockwise.

Grab Grip Board
You can grab both edges of the board simultaneously—or one after the other—using either one or both hands.

Straight legs
It is a jump performed with both legs extended simultaneously in the air.

Stiffy Air
A situation where both legs are extended straight, combined with a grab board maneuver—typically grabbing the front edge between the backhand and the binding.


Caballerials (abbreviated as Cab)
Start with a Fakie slide, then rotate 360 degrees, and finish by landing in a Fakie slide.


Airborne straight gliding
Simply put, it’s about gliding in a straight line without any aerial maneuvers—sliding as high and as far as possible. Airborne straight-line gliding serves as the foundation for mastering all other aerial techniques, making its importance absolutely undeniable. The key is to maintain smooth, fluid movements. While airborne, aim to sustain your lift for as long as possible. Keep your center of gravity low by bending your knees, and when landing, lean forward with your body and snowboard simultaneously. Be sure to absorb the impact gracefully, then let momentum carry you smoothly into the next phase of your ride.

Invert Backflip

This refers to a situation where the head is closer to the ground than the feet, requiring the use of hands to maintain balance. This trick is often performed in snowboard parks; it’s highly challenging and extremely risky.

Falling Leaf "Z"-Shaped Slide
On the slope, open your arms wide to maintain balance. You can then practice this move by either gliding forward on the back edge (with your body facing the slope) or sliding backward on the front edge (with your body turned away from the slope). The motion resembles falling autumn leaves—gentle, flowing movements that drift smoothly from left to right and back again. The key technique here is to guide your body’s movement simply by subtly turning your head. For instance, as you glide smoothly toward the left edge of the slope (with your head already tilted slightly to the left), instantly pivot your head in the opposite direction—toward the right. This shift in your head will naturally cause the snowboard to glide sideways to the right. Repeat this rhythmic, head-directed motion to glide effortlessly down the slope. Mastering this technique is crucial for beginners, as it lays the foundation for learning turns and other advanced maneuvers in the future.

Reverse sliding
All movements in snowboarding are the opposite of forward gliding—reverse gliding makes edge control and turning surprisingly simple. Yet, make even a small change, and you’ll feel like you’re starting from scratch, needing to relearn everything. Reverse gliding is exactly that kind of technique that demands you step back and rebuild your skills. Mastering reverse gliding is crucial, as it becomes an essential tool when you need to safely stop mid-maneuver or land gracefully after attempting more advanced tricks. So why not start right away? Head to the beginner area, position yourself at the starting point, and cross the slope horizontally. From there, you can gradually practice executing smooth, continuous turns while riding backward. Once you’ve nailed this technique, you’ll be ready to seamlessly integrate it into your regular snowboarding sessions!

Turning
This part is crucial—pay close attention. As your board starts sliding down the slope vertically, gradually ease off the pressure on the edge of the board and see how it feels. Your front foot will naturally begin to glide downhill, and as the board aligns parallel to the slope, you’ll start picking up speed. To initiate a turn, shift your weight onto your heels to press into the snow—this will smoothly transition you into backside carving. Alternatively, if you apply pressure with your toes, you’ll switch to forward-side carving. During the edge-change phase, pause briefly until the tip of your board points directly downhill. Keep your eyes fixed on the direction you want to go, as this will guide both your upper body—and ultimately your hips—to follow suit. This alignment ensures that your arms can naturally extend in the desired direction, making it easier for your shoulders to turn smoothly. And remember: avoid staring at the ground beneath your intended path, especially when you’re carving on your forward edge.
Tip: When you’re ready to turn, let your shoulders follow your head—and then your hips and feet will naturally move along too. Got it!

Slob Air
The front hand grips the front edge, holding onto the toes of the front foot.

Crail Air
Afterward, grab the front edge of the front foot's toe from the front of your body.

Mute Air
Grasp the front edge—either the part near the toe of the front foot or the section between the bindings—with your front hand, while simultaneously extending your back leg outward.

Mellanchollie air
Grasp the rear blade portion between the front-hand fixators.

Indy Grab
Grasp the front edge between the rear hand's stabilizers, but ensure the rear hand wraps the board inward from the outside of the back foot.
Tip: When performing this trick, don’t actively reach for the board with your hands—this is a major mistake. Instead, you must pull the snowboard close to your body before attempting to grab it. However, simultaneously pulling the board toward your body with both feet is also incorrect. Instead, wait until you’ve reached the peak of your jump, just as you’re about to land—specifically, when your front foot lifts the board upward while your back foot naturally follows. That’s the exact moment to grab the board.

Indy Nosebone
After completing the Indy Grab—specifically, using your backhand to grab the front edge between the bindings while simultaneously kicking your front leg forward—the board-control motion becomes slightly more stylish than the Indy Grab itself.


Boneless
This trick might sound complicated, but it’s actually not that difficult. I recommend starting by practicing a few times on flat ground—first with both feet in the bindings, and then gradually removing your back foot from the binding altogether, placing it instead on the non-slip pad on the board. When you’re ready to slide down, you can give yourself a little jump before quickly executing a grab motion with your back hand at the moment you feel just right, then releasing your grip. The tricky part comes next: carefully guiding your foot back onto the board. This step requires some finesse—try landing primarily using only the foot still secured in the binding, which can be surprisingly challenging since it significantly ups the difficulty of maintaining your balance. Be patient and take your time; let your body naturally stabilize before committing to the landing. Mastering this technique will take a bit of practice, but once you’ve nailed it a few times, it’ll start feeling much more effortless. So, begin by practicing on flat ground to get comfortable with moving downward using just one foot—and only when you feel confident enough should you move on to tackling the slope!

Stale Fish
This is a very classic grab move. The back hand grabs the back edge between the two rear bindings. As you do this, your back hand should loop around the outside of your back leg to reach the board, while your front hand naturally rises upward.
Tip: When performing the backside spin, make sure your body doesn’t lean backward. In other words, keep your center of gravity directly over the board. The moment you pull the board up to your hips marks the highest point of your jump. After completing the move, quickly bring your hands back to restore balance before landing smoothly.

Roast Beef
After a low-center-of-gravity glide followed by a jump, bend your knees and use the board's rebound force to pull the snowboard close to your body. Meanwhile, reach your backhand through the gap between your legs to grab the rear edge of the board’s binding, while your front hand naturally lifts upward.
Tip: Don’t lean your body—maintain your balance and get ready for landing.

Japan Air
Reach forward with your leading hand, grabbing the front edge of the board from the outside toward the inside of your front foot while bending your knees. At the same time, lift your trailing hand backward. Importantly, maintain your body balance throughout this motion—only then can you achieve optimal stability in mid-air. As you grab the board, shift your weight onto your front leg, which will also help you land smoothly. When performing this move, your back leg typically pushes backward for extra momentum. And remember: avoid letting the board glide parallel to the ground, as that could pull your leading hand downward and create an unattractive, awkward posture. This technique is very similar to the Mute Air—but in the latter, you’re actually grabbing the nose of the board’s front edge instead.

Method Air
Grasp the back edge of the binding between your front hand and body, positioning it along the rear blade. To execute this move successfully, you’ll need a high takeoff with ample airtime. That’s why finding the right kicker is crucial. After jumping, bend your knees and use your heels to pull the snowboard upward toward your hips. Simultaneously, swing your back hand forward toward your shoulder, while rotating your upper body diagonally to the right. Finally, guide your front hand around the outside of your front foot, grabbing the back edge just behind both feet. As you release your hands, shift your center of gravity lower and prepare for landing. If, during the grab, your leading hand manages to lift the board all the way up to hip level, you’ve landed what could very well be a near-perfect Method Air.

Tweak
Whenever you complete a movement, make small adjustments to your original posture—for example, after finishing a motion that requires you to push your foot forward, extend your foot even farther just before ending the action.

Tail Grab: Backhand Grip on the Tail
This is the basic motion for grabbing the board. After jumping, use the board’s rebound to pull the back foot forward, bringing the snowboard closer to your body. As you land, keep your back leg extended, continuing to pull the board backward and upward away from your body. At the same time, kick your front leg forward while simultaneously pressing down on the board’s nose. Your front hand naturally follows by reaching forward, making it easy for your back hand to grab the tail of the board.
Tip: The best time to grab the board is just as you start descending after reaching the highest point of your jump. Also, make sure to shift your weight toward the center of the snowboard for a safe landing.

Sad Air
Grasp the front blade section between the hand grips. Then, push the front leg forward forcefully.

Nose Grab: Front Hand on the Nose of the Board
After takeoff, use the board's rebound force to pull the back foot toward your body while leading with the front foot. During the landing phase, keep pulling the board inward toward your body with your front leg, while simultaneously kicking the back leg forward. Press down on the tail of the board, and naturally extend your back hand backward—this will make it easy for your front hand to grab the tail.

Lien Air
The front leg’s knee is slightly bent, while the front hand grips the back edge of the board near its nose—specifically, just ahead of the front binding’s rear edge. Then, extend your back leg fully; this action instantly lifts the board upward with the hand holding it. Next, lean your upper body forward, causing your body to tilt toward the back edge at the nose end of the board. Once you’ve confirmed that you can maintain this tilted position, you can simultaneously bend both knees. And just like that, you’ve successfully executed a Lien Method move—a technique that demands a high level of skill and control.

Tai Pan Air
Guide your front hand through the inside of your front foot, reaching forward to grab the front edge of the board between your front and back feet.

Suitcase Air
Bend both knees simultaneously, leaning them outward as far as possible—until your heels can touch your hips. However, this movement differs from Method’s action of pulling the board upward. Next, reach your front hand underneath the board to grab its forward edge.


Canadian Bacon Air
Knees are slightly bent, and the upper body leans forward. Then, the backhand grabs the front edge of the area between your legs, passing along the back of your trailing leg. Now, shift your weight toward the tail of the board while simultaneously extending your back leg to create a tailbone position.


Nuclear Grab
First, perform a Crail grab move. Then, gently bend your front knee—this will naturally position your body as if you’re already executing the grab. Next, bring your back hand across the front side of your body to grab the same spot where you’d normally execute an Lien Air. Finally, extend your back leg outward to create the tailbone position, completing the grab. When you extend the back leg’s outer edge while simultaneously pulling the board forward onto its inner edge during the grab, the whole motion becomes visually striking. However, make sure to keep your gaze directed straight ahead as you lean onto the back edge—otherwise, your movement will look awkward and unpolished, almost like a poorly executed back-edge rotation.


Seatbelt Air
Start with the Canadian Bacon Air as your base move, but instead of leaning toward the tail of the board and kicking your back leg out to create a tailbone effect, bend your knees while simultaneously arching your back as far as possible into a graceful curve. Of course, always keep an eye on maintaining your balance throughout the motion.


Chicken Salad Air
The front hand grabs the back edge between the fixators positioned between the legs. The wrist is then rotated inward to complete the grab.


Mute Stiffy
After takeoff, bend your knees and pull the snowboard close to your body—similar to the Japan Air maneuver. At the peak of the jump, extend both legs simultaneously, or just the back leg if preferred. As the back leg pushes the board into a horizontal position, the front leg naturally straightens, allowing you to stand the board upright. At this moment, lean forward with your upper body and reach out with your leading hand to grab the front edge of the board.

Tip: Maintain your body balance carefully when extending your legs in the air.


Corkscrew
This noun is commonly used to describe a relatively quick and effortless spinning motion—whether in freestyle skiing or in halfpipe maneuvers. It can also refer to any type of rotation that occurs without an axis.


Grasser
A method of the grab board technique—except Grasser grabs the nose of the board, pulling it upward from in front of the body with the nose pointing downward.


Revert: Convert to Glide
Switching from forward gliding to backward gliding, or vice versa—from backward to forward gliding.


Swiss Cheese Air
Reach behind with both legs to grab the back heel's edge, while simultaneously kicking the back leg forward.


Misty Flip
During the aerial straight-line jump, the athlete performs a 540-degree forward flip (also known as the McTwist 540), launching into the air with a forward glide and landing in an inverted, backward-gliding position.


Nose Bonk
Use the snowboard tip to tap the object, then immediately glide away.


Nose Slide
Simply glide across the ground or over objects using just the edge of the board.


Nose press
Slide the board's nose along the railing or across the ground.


Backflip
This is one of the simplest tricks. All it requires is quick reflexes and courage. Before you learn this trick, here’s a piece of advice: Why not try diving, trampoline jumping, or some other relatively safe activity that still lets you experience the exhilarating sensation of soaring through the air? Of course, you could also practice on soft snow for added fun and safety.

Imagine this action—it’s a crucial first step before you even begin learning. And remember: in your mind, you’re already performing the technique flawlessly. The more you visualize it, the better.

Start at full speed and jump straight out without needing to do an Ollie.

Before taking off, first lower your center of gravity and stand firmly with your body relaxed. This will help you maintain better balance and reduce the chances of failing your jump.

Plenty of jumping power—this is the most important thing. I’ve seen it happen more than once: people accidentally hit their heads when taking off. If you twist your body too sharply during the jump, you’ll likely struggle to reach great heights. Bend your knees slightly, keep your head tilted back, and lift your hips upward. After all, hip movement plays a crucial role in virtually every sport. In this particular exercise, relying solely on your head and upper body probably won’t generate enough momentum, so tapping into the power of your hips is essential. Let’s use physics to help us master this move!

When you're in the air, you might want to curl your body up—though that depends on how high you’re jumping. One thing I should mention: if you overrotate and land on your back, it’s actually much better than landing face-first!

Keep your eyes focused on the landing spot. As soon as you’re in the air, start scanning for where you’ll touch down. An added benefit of doing this is that it helps your movements appear smoother and more polished. That’s also why bending over with your head tilted back is so crucial—it allows your eyes to guide you toward the correct landing direction. Once you spot the ground, lock your gaze firmly on it and avoid looking around nervously. This instinctive reaction is natural, but if necessary, make subtle adjustments to your body rotation. As I mentioned earlier, if you’re spinning too fast, gently extend your body to slow down; however, if you’re rotating too slowly, quickly curl up into a tighter position to regain momentum.

Keep your eyes fixed where you're aiming—your momentum might carry you forward for a short glide. Since this is a backflip, the tail end of the board will touch down slightly before the nose when you land. This technique is still being refined and improved upon continuously.

Backside Rodeo: Backward Flip with a Twist
This trick looks like it spirals outward as it’s executed from behind—it’s a challenging yet incredibly eye-catching maneuver. To pull it off, you’ll need plenty of airtime. Start with a low-center-of-gravity glide, then push off as high and as far as possible. As you launch forward, use the board to initiate a smooth rotation backward while simultaneously bending your knees and bringing the board close to your body. At the same time, reach forward with your leading hand to grab the back edge of the board. Once airborne, keep your knees bent and tuck your body tightly into a compact position to minimize drag and maximize rotational speed. After completing the turn, quickly lock your gaze on the landing spot. Since this is a wide-ranging, dynamic spin, make sure to gently pull the board closer to your body just before touchdown—this helps absorb the impact and prevents tipping or falling, allowing you to land softly and safely.

Overview of the Turn:

Let’s start by discussing the differences between forward-edge spins and backward-edge spins, as these two moves are often easily confused. For a skier who steps forward with their left foot (and most people do!), a forward-edge spin involves rotating counterclockwise, while a backward-edge spin means turning clockwise. The opposite is true for skiers who step forward with their right foot. Interestingly, about 90% of people seem to think that backward-edge spins look cooler—and perhaps even easier—than forward-edge spins. But I don’t agree. In reality, backward-edge spins simply feel smoother when landing. So why not give both a try on a flat, stable surface and see which one feels more comfortable for you?

How to execute a spin—To master spinning, you first need to learn how to turn your body. A 180-degree turn is surprisingly easy to grasp: all you have to do is jump into the air and then simply rotate your body 180 degrees to complete the move. However, if you want to nail a true, full rotation, you’ll first need to perfect the 360-degree turn. Without it, you won’t be able to pull off more intricate spinning maneuvers. So, how do you perform even bigger, more dynamic spins? Here’s the key: start turning the moment you leap into the air—and simultaneously point your fingers in the direction you intend to rotate toward. This skill is absolutely essential!

But how do you start rotating the moment you leave the ground during a jump? There’s one key requirement: As you initiate the spin, twist your upper body—or your arms—toward the **opposite direction** of where you want to turn. We call this technique the "PREWIND." Let’s take an example: If you’re performing a frontside rotation (and you’re a goofy-footed rider), your upper body and arms should first rotate clockwise. Once you launch into the air, you’ll have plenty of space—and enough momentum—to swiftly swing your arms in the desired direction, setting up that powerful, rapid spin. The harder you pull your arms back, the faster you’ll rotate. The perfect takeoff happens precisely when your body lands right back over the center of the board, neither too early nor too late. This ensures a smoother, more controlled rotation. Don’t rush it—practice makes perfect!


"Takeoff"
Now you’ve probably noticed—when you master the PREWIND, you’ll find it easier to control your board. It responds more smoothly to your movements, but precisely because of this, you may easily end up landing slightly ahead of where you intended to take off. To avoid this, make sure to shift your weight onto the back edge as you prepare for a forward-edge rotation. Conversely, when performing a backward-edge rotation, shift your weight to the front edge instead. You’ve probably seen this happen often: people cutting into the snow just as they “take off,” right? That’s usually because they’ve either leaned too much—or not enough—onto the front or back edge, throwing off their balance. So remember, transfer exactly the right amount of weight—no more, no less—because getting it just right is key to maintaining stability and landing smoothly.


"Rotation"
To maintain your balance while spinning, keep your eyes focused through your shoulders in the direction you’re rotating. No matter how forcefully you initiate the turn, make sure it stays within your line of sight. Additionally, bend your arms across your chest—this will help stabilize your body and keep you balanced throughout the spin.


"Grounding"
To land safely, the very first thing you should do is, of course, stop spinning. If you’re not a beginner and feel confident—and if you’re already comfortable landing after spinning—you can try landing without slowing down your rotation. However, if you’re a beginner, landing this way will be nearly impossible. That’s why you’ll need to gradually reduce your spinning speed. As you come to a stop, instead of continuing to face the direction you were spinning in, shift your gaze toward where you want to land. And if that still doesn’t feel quite enough, you can extend your arms slightly to help slow yourself down even further. You might notice that you’ll still feel like you’re spinning—even as you’re coming to rest. But don’t worry about it! The key is to remember this sensation when you finally touch the ground. That way, you’ll naturally land at the peak of your spin, with your landing point right in your line of sight. Just make sure to land with a bit of force—this will help absorb the impact and keep you stable.


180-degree spin (including FS-180 forward-edge 180 and BS-180 back-edge 180)
This technique is perfect for beginners. You don’t need to jump very high—actually, you don’t even have to jump at all! Before reaching the edge of the slope, if you’re a left-foot-forward rider performing a frontside 180, simply start by gently rotating your body and arms clockwise as you approach the lip. As soon as your body clears the edge, quickly reverse the direction—twisting your arms and torso counterclockwise. Since you’re only turning 180 degrees, you won’t need excessive rotational force to achieve the turn. When you land, your right foot will be forward, with your left foot trailing behind—a reverse landing position. On the other hand, a backside 180 involves the same basic motion but with a different directional twist. Interestingly, this reverse landing pattern also occurs during 540s and 900s.


360 Spin (including FS-360 Frontside 360 and BS-360 Backside 360)
Once you’ve mastered the 180-degree spin, keep going—continue rotating until you can complete a full 360-degree turn, with your board returning to its original position. Learning to perform a stationary 360 is actually no different from mastering any frontside or backside rotation. All you need to do is keep spinning steadily; as soon as your board points directly toward the mountain peak, that’s when you should stop—and it’s time to switch edges. From there, simply complete another half rotation, and voilà—you’ve executed a perfect 360! Additionally, you’ll want to refine your skills further by becoming equally comfortable turning both on the frontside edge and the backside edge.

If you’re afraid of falling, learning the 360-degree spin might be a bit challenging. Before attempting the 360, you’ll need to master the high-speed 180-degree spin first. A great way to practice the 360 is to start with a single 180-degree spin, immediately followed by another 180-degree spin right after. Here’s what I mean: execute a 180 at the peak of your jump, then complete another 180 just before landing. If you can perform this sequence smoothly and maintain the same speed throughout—both in the air and upon landing—it’s a clear sign that you’ve nailed the 360-degree spin.

As you glide toward the top of the slope, swing your arms in the opposite direction of the turn you want to make. Just as you reach the peak and your body is almost airborne, quickly bring your arms across to the other side of your body while twisting your head—this will naturally guide your legs into position. If you swing your arms with enough amplitude, executing a smooth 360-degree turn will become effortless.

When turning, avoid leaning your body backward. Many people tend to lose their balance after completing a 270-degree turn. That’s why mastering this technique requires consistent, repeated practice. And remember, don’t rush to show off in front of others—only reveal your skills once you’ve perfected the move, making sure it feels smooth and effortless!

A 360 forward-edge spin involves rotating toward the front edge, while a 360 back-edge spin naturally rotates toward the back edge. It doesn’t matter whether you’re skating with your left foot forward or your right foot forward—it’s the same either way.

Performing a smooth, 360-degree spin followed by a fluid landing looks far better than a sloppy spin quickly followed by a rushed touchdown. Interestingly, the landing still involves placing the left foot forward and the right foot back—this same foot placement occurs consistently during both the 720 and 1080 spins as well.


540/720/900/1080 rotations
In principle, all these basic spinning movements use the same technique—only the intensity of the turn before spinning and the direction of landing vary slightly.

Additionally, by adding some of the moves we’ve previously introduced—like grabbing the board or performing a backflip—to these fundamental spinning maneuvers, you can craft a wide variety of unique and dynamic tricks. After all, snowboarding is all about unleashing your imagination. Today, countless athletes around the world are still pushing boundaries, constantly striving to invent new, groundbreaking moves. Every top-level rider dreams of developing their own signature style—moves that are not only tough to learn but nearly impossible to copy. And that’s precisely what makes something "cool"—a quality deeply admired and pursued within snowboarding culture. So don’t wait—let your creativity soar! Who knows? That next epic, jaw-dropping trick could very well be YOUR creation!



Share this article

Related Articles