A super-detailed animated guide to swimming—save this now if you’re eager to learn!
There’s a catchy little rhyme to help you master the breaststroke—let me share it with you before diving into the key techniques of the stroke:“The paddler keeps the legs still, pulls the arms back before bringing the legs in, extends the arms first and then pushes off with the legs, finally gliding smoothly with arms and legs fully extended.”As you can see from the rhyme, the hand movement precedes the leg movement. Always retract your hands before pulling in your legs—and extend your arms before pushing off with your feet.Leg.
1– Outward stroke. Extend both hands forward, with palms tilted at approximately…45Degree(Thumb pointing upward). Simultaneously sweep both hands outward and backward, then bend your arms to sweep them back and downward.
2– Inside sweep. Palm rotates from outward to inward, with the hand leading the forearm in an accelerating motion as it sweeps inward; the hand moves upward and comes together in front of the chest.(Hands high, elbows low—elbows beneath the shoulders.), extended forward.
3– Reach forward. Extend both hands forward.(Elbow joint extended)Please note: The outward stroke should be relaxed, while the inward stroke is powerful, completed with acceleration—and the forward reach should be proactive.
The complete coordinated movements of breaststroke: Lift your head to breathe as your arms sweep outward, pull your legs in and lower your head while briefly holding your breath as your arms return inward, and finally kick and exhale as your arms extend fully forward over your head.
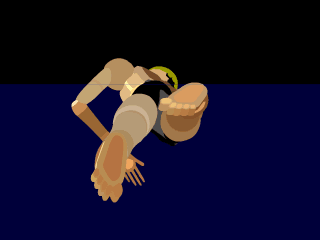
11. Pulling the legs in: Bend your knees and draw your heels toward your buttocks, keeping your calves tucked behind your thighs as you slowly retract your legs. This helps minimize resistance. At the end of the leg-retraction phase, your knees should be shoulder-width apart, with your calves perpendicular to the water surface, and your toes just above the waterline.
2• Foot Turn: Keep both feet wider apart than the distance between your knees, with your feet turned outward—tips pointing outward and insteps facing upward. Align your lower legs and inner feet toward the water, forming a shape that resembles an English letter.“W”
3• Frog kick: This is essentially the process of straightening the legs.(Flex the hip, extend the knee), engage your core, abdomen, and thighs simultaneously, using a smooth, coordinated motion: first push outward, backward, and downward with your shins and the insides of your feet, then reverse direction by pushing inward and upward—essentially tracing half a circle in the water. The outward push and inward squeeze are performed seamlessly in one continuous motion, often referred to as "push-and-squeeze." As you complete the kick-and-pull cycle, bring your legs together and straighten them out, turning your feet slightly inward so that your toes face each other. Remember not to rush the movement; instead, gradually increase your speed from slow to fast, reaching peak power just before your legs fully extend and come together.
4• Stop: Bring both legs together and extend them straight out, followed by a brief glide.(1-2Second)
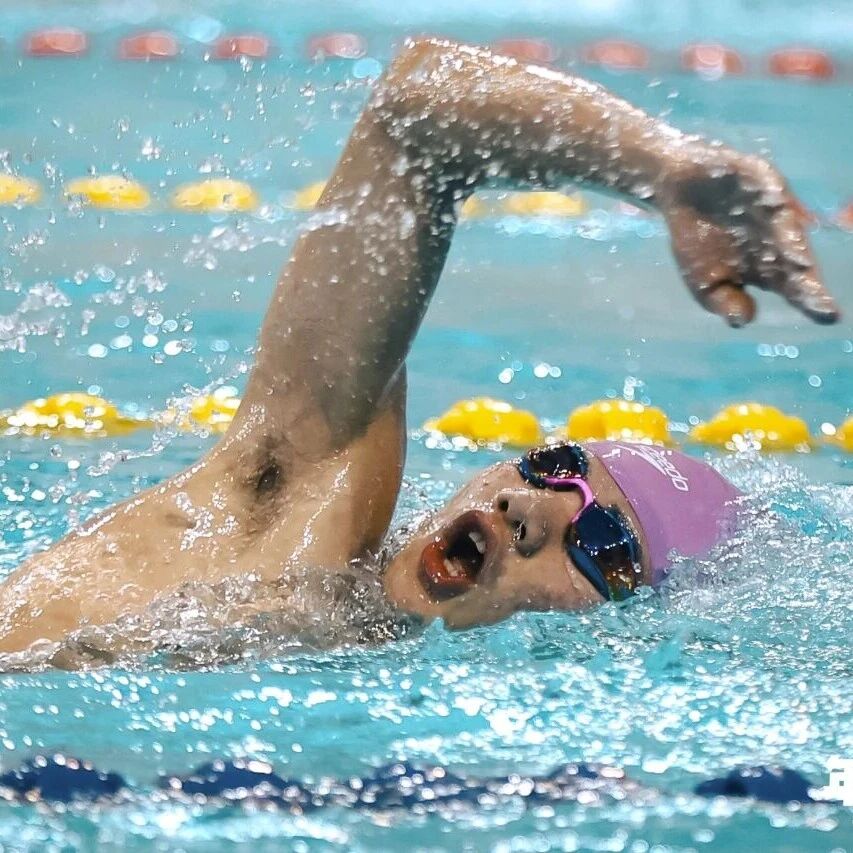
Freestyle swimming
Swimming is a full-body exercise, where the coordinated movement of every single body part is essential for overall efficiency. On the surface, it may seem that freestyle relies solely on arm strokes and leg kicks to generate propulsion—but in reality, the role of the core cannot be overlooked. First, the torso must maintain a steady level of tension; if the lower back feels loose or floppy, the entire body loses its structure, much like a shapeless mass of clay. Second, twisting the body effectively allows the powerful muscles of the core to contribute more efficiently, reducing drag and enhancing performance.
Complete coordination in freestyle swimming comes in various forms. A common one is every arm stroke2Next, fetch water.6Next, breathe1Next.
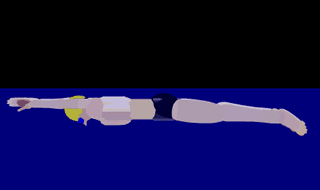
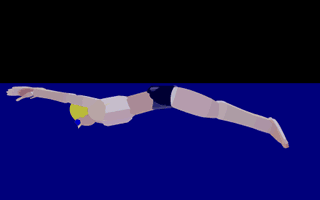
1The hand enters the water between the extension of the shoulder and the body's midline, leading with the thumb and entering at an angle.
2Once in the water, continue extending your hands, elbows, and shoulders forward to lengthen your arms. As your body rotates, flex your wrists and bend your elbows, sweeping your arms outward and backward to catch the water.;After the stroke reaches its lowest point, rotate your arm inward, upward, and backward as you pull through the water, maintaining a high-elbow, bent-arm recovery position.
3When the arm is perpendicular to the water surface, initiate the stroke with a leading hand, accelerating through the push phase. Then, smoothly transition the arm outward, upward, and backward—moving it all the way to the side of the thigh—before lifting the elbow out of the water.
4After exiting the water, naturally and relaxedly move your arm forward through the air, maintaining a high-elbow position. Then, let your hand enter the water slightly ahead of your shoulder, initiating the next stroke.
1The arm follows a curved swimming motion underwater, and when viewed from the side, the hand traces a path relative to the body as it moves through the water.“S”Shape.
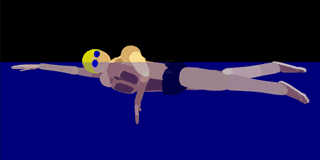
2, Freestyle arm coordination includes front crossover, mid-crossover, and rear crossover techniques.3Three basic forms. This diagram illustrates the anterior cruciate form, which is a relatively easy approach for beginners to master.
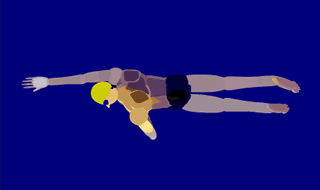
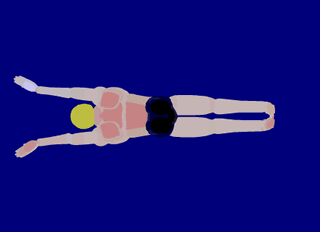
The single-arm sculling motion is an exercise that beginners should focus on practicing. As shown in the diagram, while the left arm performs the sculling motion, the right arm can hold onto the kickboard. Typically, the legs provide the propulsion.10After mastering the basics, stroke once with your arms while swimming. Once you’ve reached a certain level of proficiency, you can start incorporating breathing exercises.
1The kicking motion starts with power generated from the hips, with the thighs driving the calves into a whip-like kicking action.
2– Kick upward with the legs, starting from a straight position and gradually bending at the knees. Initiate the kick by extending your legs straight, then bend your knees as your feet approach the water’s surface, lifting your lower legs so that your toes break the water’s edge before driving downward. You can begin with fully extended legs, but keep them slightly relaxed—avoid stiffness—and let the natural pressure of the water cause your legs to bend smoothly. Before pushing downward, ensure your knee joints are bent at an angle of approximately…130-160Degree, with a water-drawing amplitude of approximately30-40Centimeters. Keep your feet tense when splashing water.(Ballet foot), don't hook your feet.
Butterfly stroke
1The entry point for the butterfly stroke is on the extension of both shoulders, with the thumb leading as it enters the water at a slight angle.
2Once in the water, extend your shoulders and elbows forward, then sweep both hands outward, backward, and downward along a curved path to catch the water. As your hands spread to shoulder-width, bend your elbows and accelerate the pull through the water.
3Once the arms are spread out to their maximum width, they begin an inward, upward, and backward sweep through the water, maintaining a high elbow position throughout the recovery phase. The hands come closest together when positioned just below the chest or abdomen.
4"Coordinating breathing with the arm strokes is also key to butterfly technique. As the arms finish their inward sweep, lift your head out of the water to inhale, then lower it back into the water as you begin the recovery phase. Remember these two steps—"“Previously”, meaning the head exits the water before the hands do, and re-enters the water before the hands.
1When the hands are closest together during the butterfly stroke's two-handed pull, the direction of the arm movement changes once again—shifting outward, upward, and backward—until the arms exit the water.
2After breaking the water, the arm moves forward through the air, driven by the shoulder, preparing to enter the water. Typically, the arm movement is performed in a low, horizontal, and relaxed posture, sweeping outward from both sides.
3Mastering the body position in butterfly stroke is particularly challenging, and mastering the whip-like kick motion isn’t easy either. When learning butterfly, we’ll provide specialized, step-by-step drills to help you gradually perfect each component of the technique.
1The typical butterfly stroke arm movement path is“Keyhole”The "shape" refers to the point where the distance between both hands is shortest—either under the chest or abdomen—resulting in a more even, front-to-back paddling motion.
2, Note that in butterfly stroke, the arm and leg movements involve simultaneous, coordinated (force generation) of both arms and legs.

Related Articles
"Rising Stars" Unite! Over 300 Young Second-Graders in Shanghai Compete in the Pool for the "Seedling Cup"
Association Announcement: Notice Regarding Matters Related to the 4th National Swimming City Series 2025 (Chengdu Stop)